Water heaters don't leak “a little” for long. Even a small drip can soak drywall, baseboards, cabinets, flooring, or the garage wall plate — and once moisture gets into porous materials, odors and secondary damage can follow.
If you're in Murrieta, Temecula, Menifee, Canyon Lake, Wildomar, Winchester, or nearby areas, the fastest way to reduce damage is to stop the water and start controlled drying early.
Need help now?
Call Rapid Clean Restoration: 877-55-FLOODStep 1: Make It Safe (Before You Investigate)
If you see active leaking, standing water, or moisture near electrical outlets/appliances:
Stop the water supply
Turn off the cold-water shutoff valve to the water heater (usually on the line above the unit). If you can't find it or it's stuck, shut off the home's main water.
Shut down the heater safely
- Electric water heater: turn off the breaker feeding the water heater.
- Gas water heater: use the control knob to turn the unit off per the label instructions.
If you smell gas or suspect a gas issue, leave the area and contact your gas utility or a licensed plumber.
Avoid electrical hazards
If water is near electrical equipment, don't step into pooled water. OSHA's flood/cleanup guidance highlights electrical hazards when water is present near electrical circuits/equipment.
Step 2: Identify What Kind of “Leak” It Is
Not all water heater leaks mean the tank failed. The location of the water tells you a lot:
Leak at the Top (Usually a Connection)
Loose/corroded flex connectors, failing shutoff valve, thermal expansion tank connection, or vent/condensation drips (sometimes mistaken for a leak).
These can sometimes be repaired by a licensed plumber without replacing the tank.
Leak at the Temperature/Pressure Relief Valve (TPR)
Water may discharge from a small pipe on the side/top area. This can indicate excess pressure/temperature conditions that need a professional evaluation.
Leak at the Drain Valve (Lower Front/Side)
Sometimes the drain valve isn’t fully closed or has failed. This can be a smaller repair scenario.
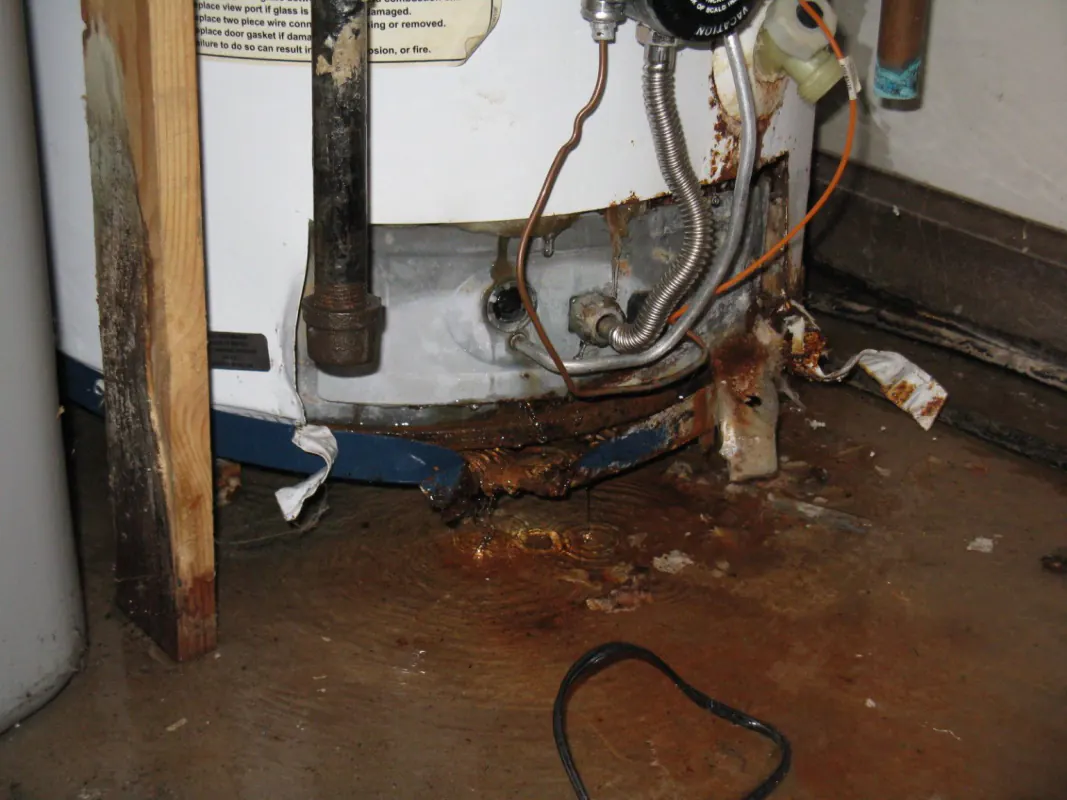
Water at the Bottom Seam (Often Tank Failure)
If water is coming from the base of the unit and not from a valve/pipe above, that often points to internal tank corrosion/failure, which typically means replacement.
Step 3: Why a Water Heater Leak Becomes Water Damage Fast
Even “clean” water can cause:
- Swollen baseboards and drywall
- Warped flooring (laminate/engineered wood)
- Wet insulation (especially garage shared walls)
- Hidden moisture inside wall cavities
Public health guidance emphasizes drying wet materials quickly — often within 24–48 hours when possible — to reduce mold growth risk. If materials are already wet, see our water damage restoration services for next steps.
Step 4: What You Can Do Immediately
If it's safe to do so:
- Move stored items away from wet areas (cardboard and textiles soak up moisture fast).
- Use towels/buckets to control spread.
- Take photos/video of the leak source, the water path, and damaged areas (this helps insurance timelines).
- Don’t trap wet materials (don’t put rugs back or close up wet cabinets and “hope it dries”).
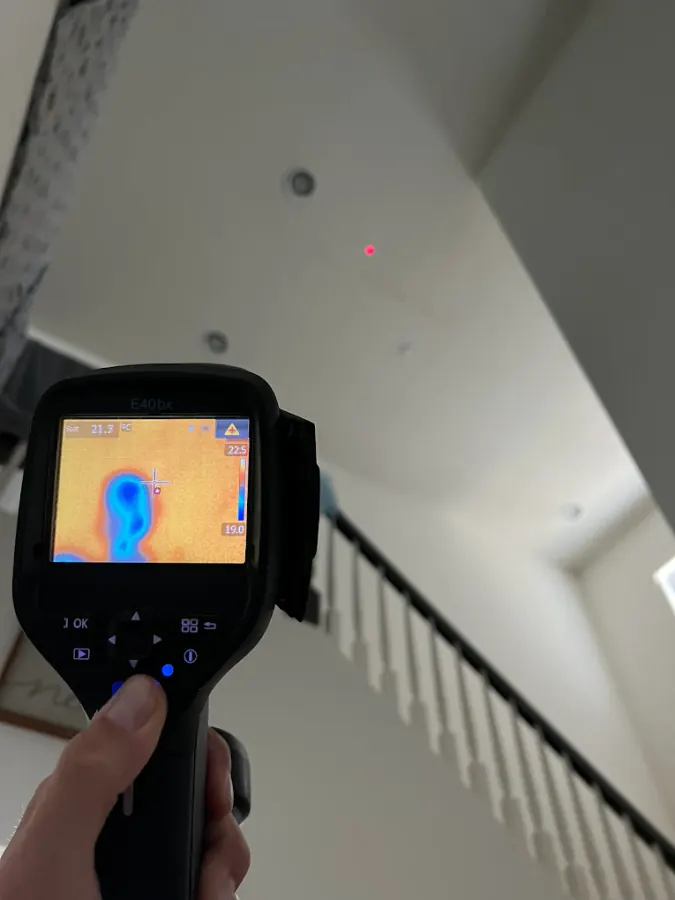
If water reached drywall, flooring edges, cabinets/toe-kicks, or insulation — this is where professional moisture mapping matters.
When to Call a Plumber vs. a Restoration Company
Call a Licensed Plumber
- Heater shutoff/valves need repair
- TPR valve discharge/pressure issues
- Tank appears to be failing and needs replacement
Call Rapid Clean Restoration
- Water reached floors, baseboards, drywall, cabinets, insulation, or garage walls
- You smell musty odor within a day or two
- You want the loss documented properly for insurance
- The leak may have been happening longer than you realized
We handle moisture mapping, controlled drying, daily monitoring, and documentation so the structure is stabilized — not just “dried out on the surface.”
Insurance Tip: Document Early, Mitigate Reasonably
California consumer guidance emphasizes making reasonable temporary repairs and taking steps to prevent further damage after a loss.
Pro move: Keep a simple timeline:
- When you discovered it
- What you shut off and when
- Photos of the source + affected rooms
- Any receipts (fans, towels, shop vac rental, etc.)
Choose an independent company
If an insurer suggests a “preferred vendor,” remember: you want a contractor focused on your outcome — proper drying, correct scope, and a clean claim file — not a bottom-line target.
California regulations prohibit an insurer from requiring you to use a specific repair individual/entity and restrict when recommendations are allowed.
Learn more about how we handle direct insurance billing.
California Add-On: Make Sure Your Water Heater Is Properly Strapped
Water heater movement in an earthquake can damage gas/water lines and cause leaks. California has seismic bracing/strapping requirements for water heaters.
If you're already dealing with a leak, this is a good time to have a qualified pro confirm the unit is properly strapped and connected.
What Rapid Clean Restoration Does for Water Heater Leaks
Water Heater Leak? We're Here to Help.
24/7 emergency response · Insurance coordination · Professional drying
877-55-FLOODReferences & Authority Sources
- CDC — Homeowners & Renters Guide to Mold Cleanup
- CDC — Mold Cleanup Tips (dry within 24–48 hours)
- EPA — Mold, Moisture, and Your Home (PDF)
- OSHA — Flood Response Electrical Hazard Guidance
- OSHA — Cleanup Hazards (PDF)
- CA Dept. of Insurance — Residential Property Claims Guide
- 25 CCR § 4100 — California Seismic Strapping Requirements
- San Diego County — Water Heater Strapping Guide (CPC reference)
Water Heater Leak Caused Damage?
Our 24/7 emergency team can help with water extraction, drying, and full restoration.
Get Emergency HelpOr learn about our water damage restoration process
Discussion
11 comments on “Water Heater Leak? What to Do First”
Our water heater in the garage started leaking on a Saturday night. Water was all over the garage floor and starting to seep under the door into the hallway. Shutting off the cold supply at the top of the tank was the right call — wish we'd known to do it faster. By the time we noticed, there was already a half inch of standing water. The step-by-step order in this article is exactly right.
This is why I always tell people to know where their water shutoff valve is BEFORE there's an emergency. We moved into our Temecula house and it took us twenty minutes to find it during a leak. Now we have a tag on the main and on the cold inlet at the heater. Everyone in the house knows where they are.
The leak-type breakdown was really helpful. Ours was the Type C situation — rusty water from the hot side and a puddle forming around the base. Plumber confirmed the tank was corroding from the inside. It was 13 years old so well past the 8-12 year range mentioned here. Replaced it proactively this time instead of waiting for a full failure.
We replaced ours at 10 years on the plumber's recommendation. About $1,200 installed. Way cheaper than the $8,000+ our neighbor spent on water damage restoration when theirs burst at 14 years old. Proactive replacement is absolutely the smarter move.
Good article. One thing I'd add — if your water heater is in the attic (some older Canyon Lake homes have this), a leak can be catastrophic because the water goes through the ceiling into multiple rooms below. A drain pan with a drain line is an absolute must up there. Also learned from this article about the seismic strapping requirement — checked ours and it was only single-strapped. Getting that fixed.
The plumber vs restoration company comparison was eye-opening. We had a slow leak for what we think was weeks and called a plumber first. He fixed the supply line fitting but didn't check the drywall or flooring around the heater. A month later we had visible mold on the lower garage wall. Ended up needing a restoration company anyway — should have called both from the start like this article suggests.
Same lesson learned here. The plumber fixes the source, the restoration company fixes the damage. They're two different jobs. After reading this I understand why both need to be involved if there's any standing water or wet drywall. The 24-48 hour mold window is real — we found that out the hard way.
Our water heater leaked slowly for what we think was weeks before we noticed (it's in the garage and we don't go back there often). By the time we found it, there was mold on the bottom two feet of the garage drywall. Had to have the drywall cut out and everything dried with commercial equipment. Now I check the water heater every week. The documentation checklist in this article would have helped us — we barely had any photos for the insurance claim.
Question — does insurance actually cover water heater leaks? Ours failed and the adjuster said because the tank was past its expected lifespan it was a 'maintenance issue' and denied the claim. We had no idea age mattered for coverage.
It depends on the cause. Our adjuster covered the water damage from a sudden supply line rupture but NOT the cost of the new water heater itself. They said the resulting damage is covered but the failed appliance is considered maintenance. The article's point about documenting everything immediately made the difference for us — we had photos timestamped within an hour of discovery.
Coming back to this article months later. We had our water heater inspected after reading this and the plumber found the T&P relief valve was dripping — a Type B leak. He replaced the valve and also pointed out our seismic straps were loose. Two easy fixes that could have become major problems. Really appreciate the detail in this article about what each leak type means and when it's serious.